Restoration Report
Conservation focused assessment and treatment record for a WWII British blackout and inspection lamp.
1. Photo Documentation
2. Object Identification
| Object Summary | |
|---|---|
| Object Type | Electric blackout and inspection lamp |
| Designation | Lamp, Electric, No. 1 |
| Country of Origin | Britain |
| Date of Manufacture | Early 1940s (examples dated 1941–1943) |
| Materials | Stamped steel case, glass lens, wire handle, painted finish, electrical contacts |
| Dimensions | Approx. 125 × 95 × 80 mm, front lens about 56 mm diameter |
| Artifact Profile | View main artifact page |
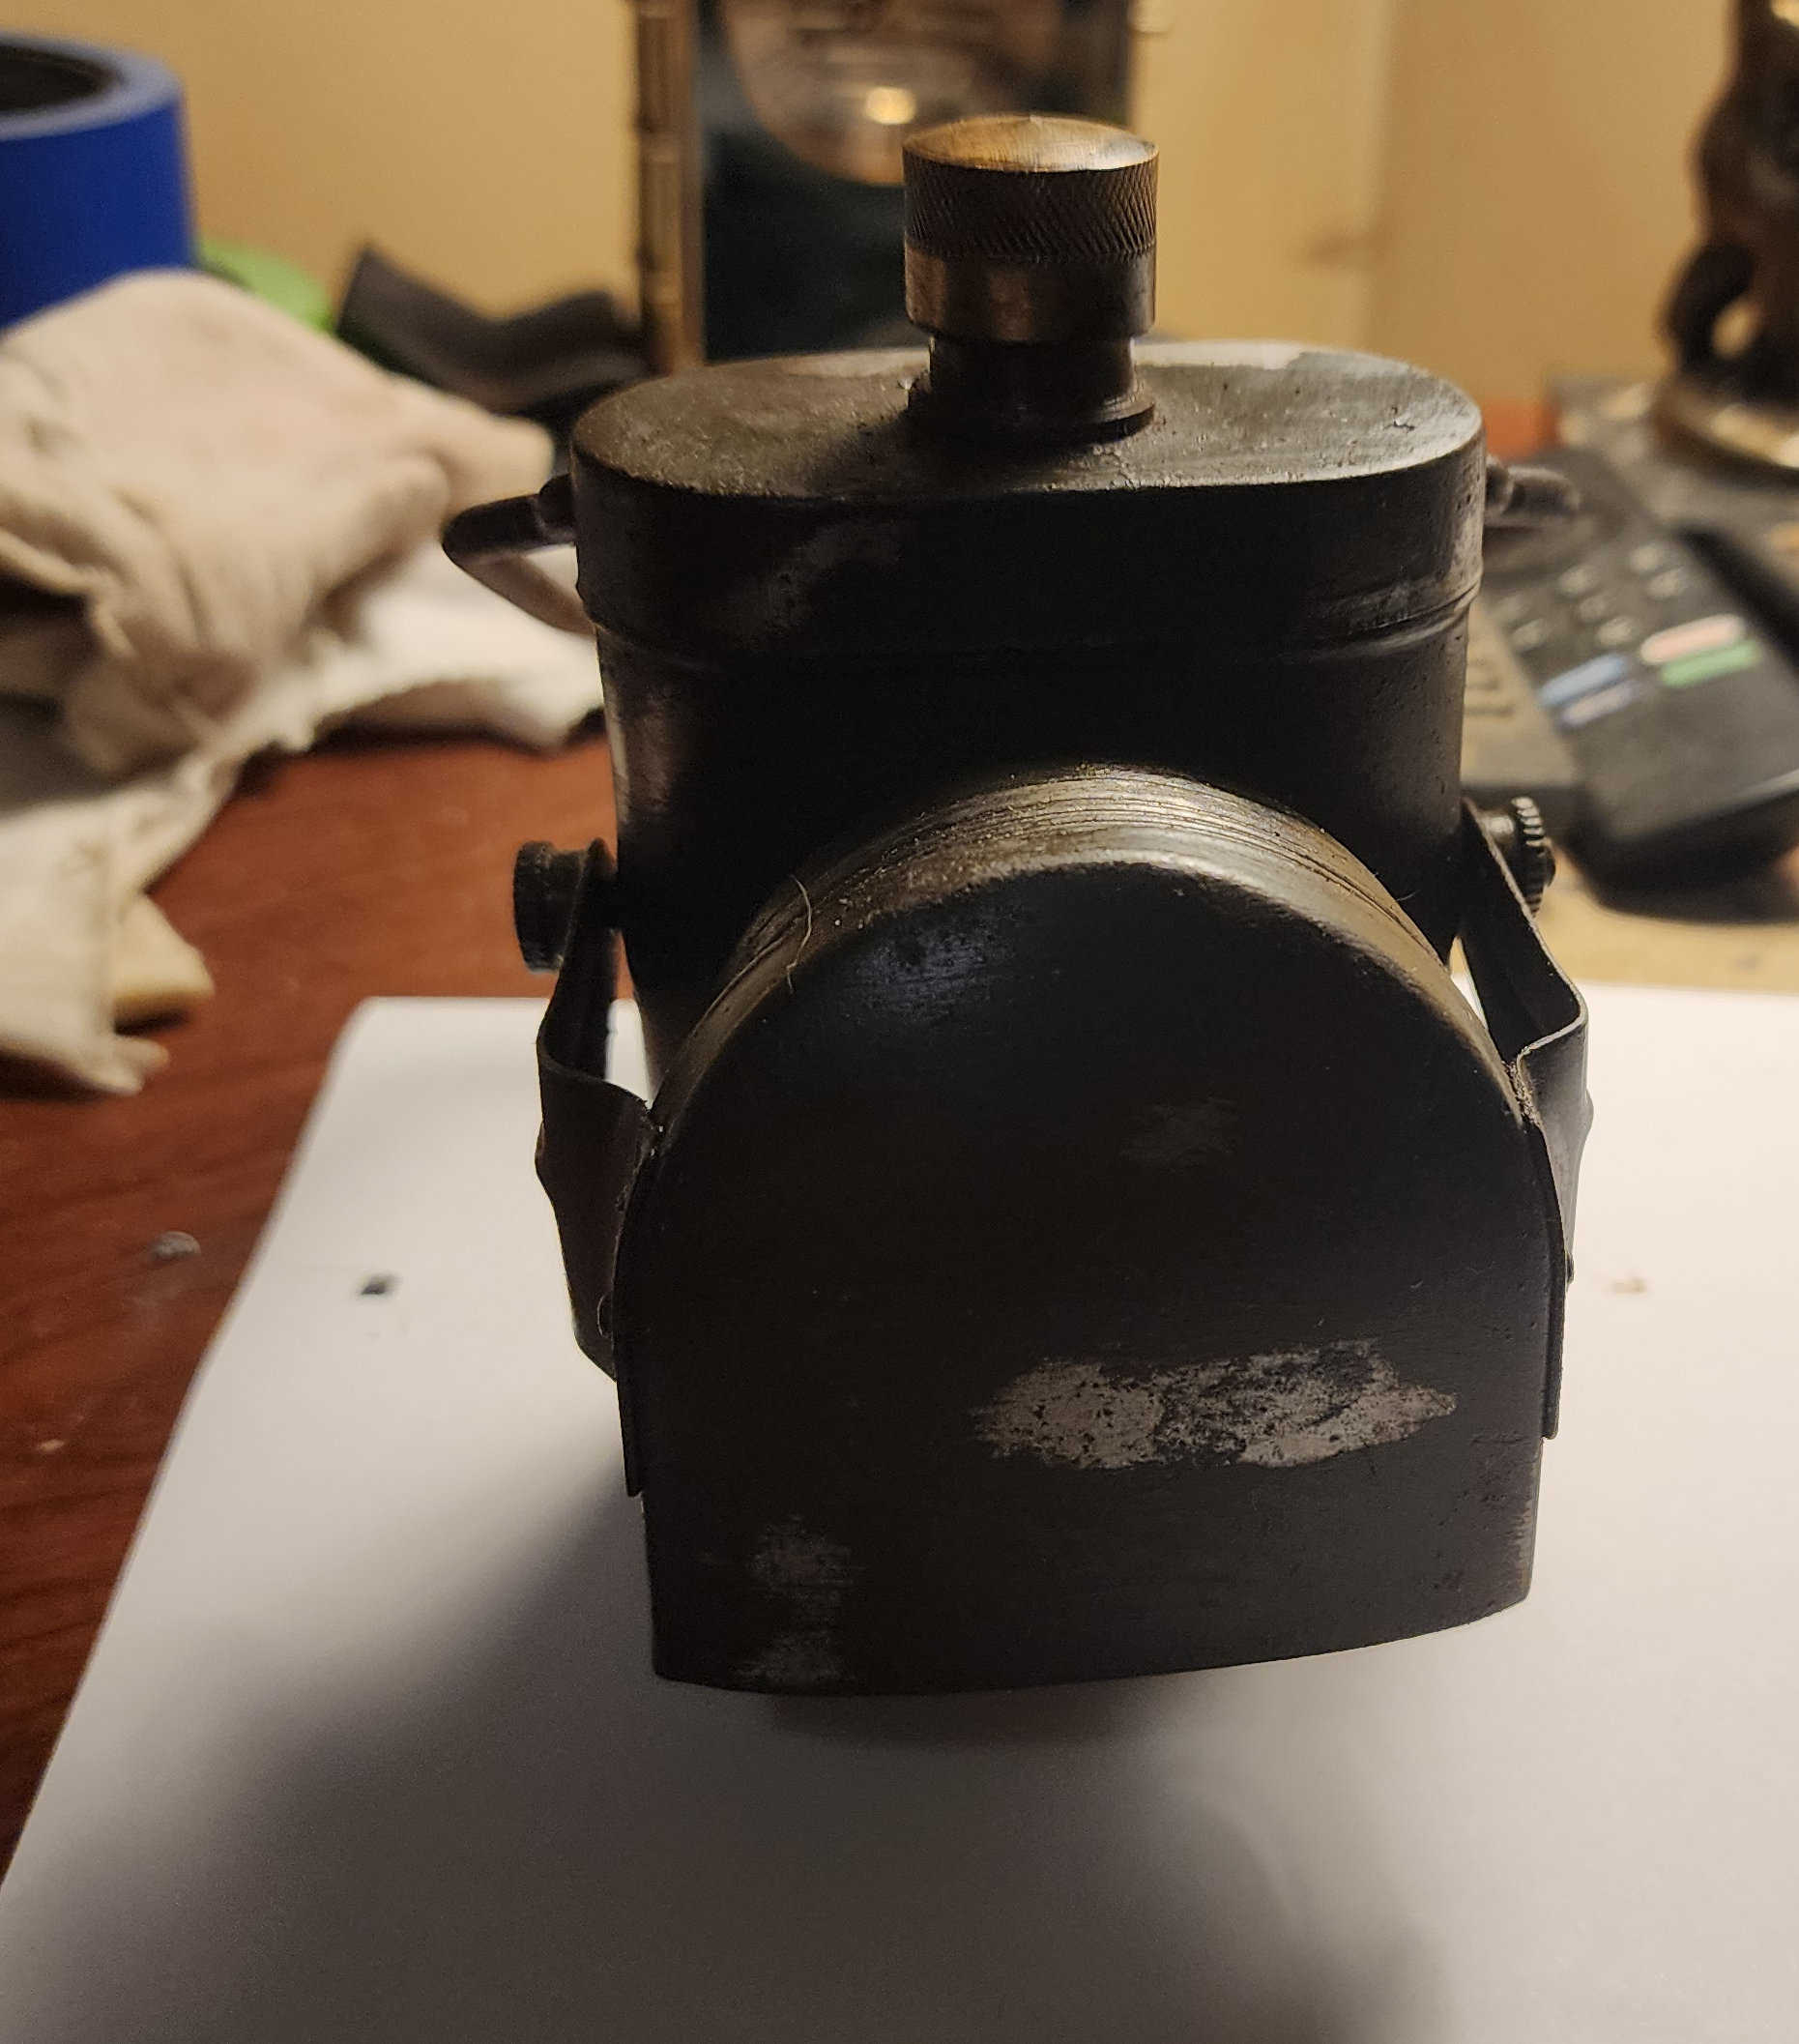
3. Condition Prior to Treatment
The lamp arrived as a complete but tired example with honest service wear. Paint and markings were still present, but dirt, oxidation and stiff moving parts showed that it had not been used in many years. The goal was to stabilize and return it to safe working order without erasing its period look.
- Moderate surface dust and grime over the painted case, especially around the hood, handle and rear clip.
- Localized surface rust on exposed edges, hardware and inside the battery compartment, with traces of old leaked cell residue.
- Hood hinge, top knob and rear clip slightly stiff from dried dirt and old oil; internal contacts dull.
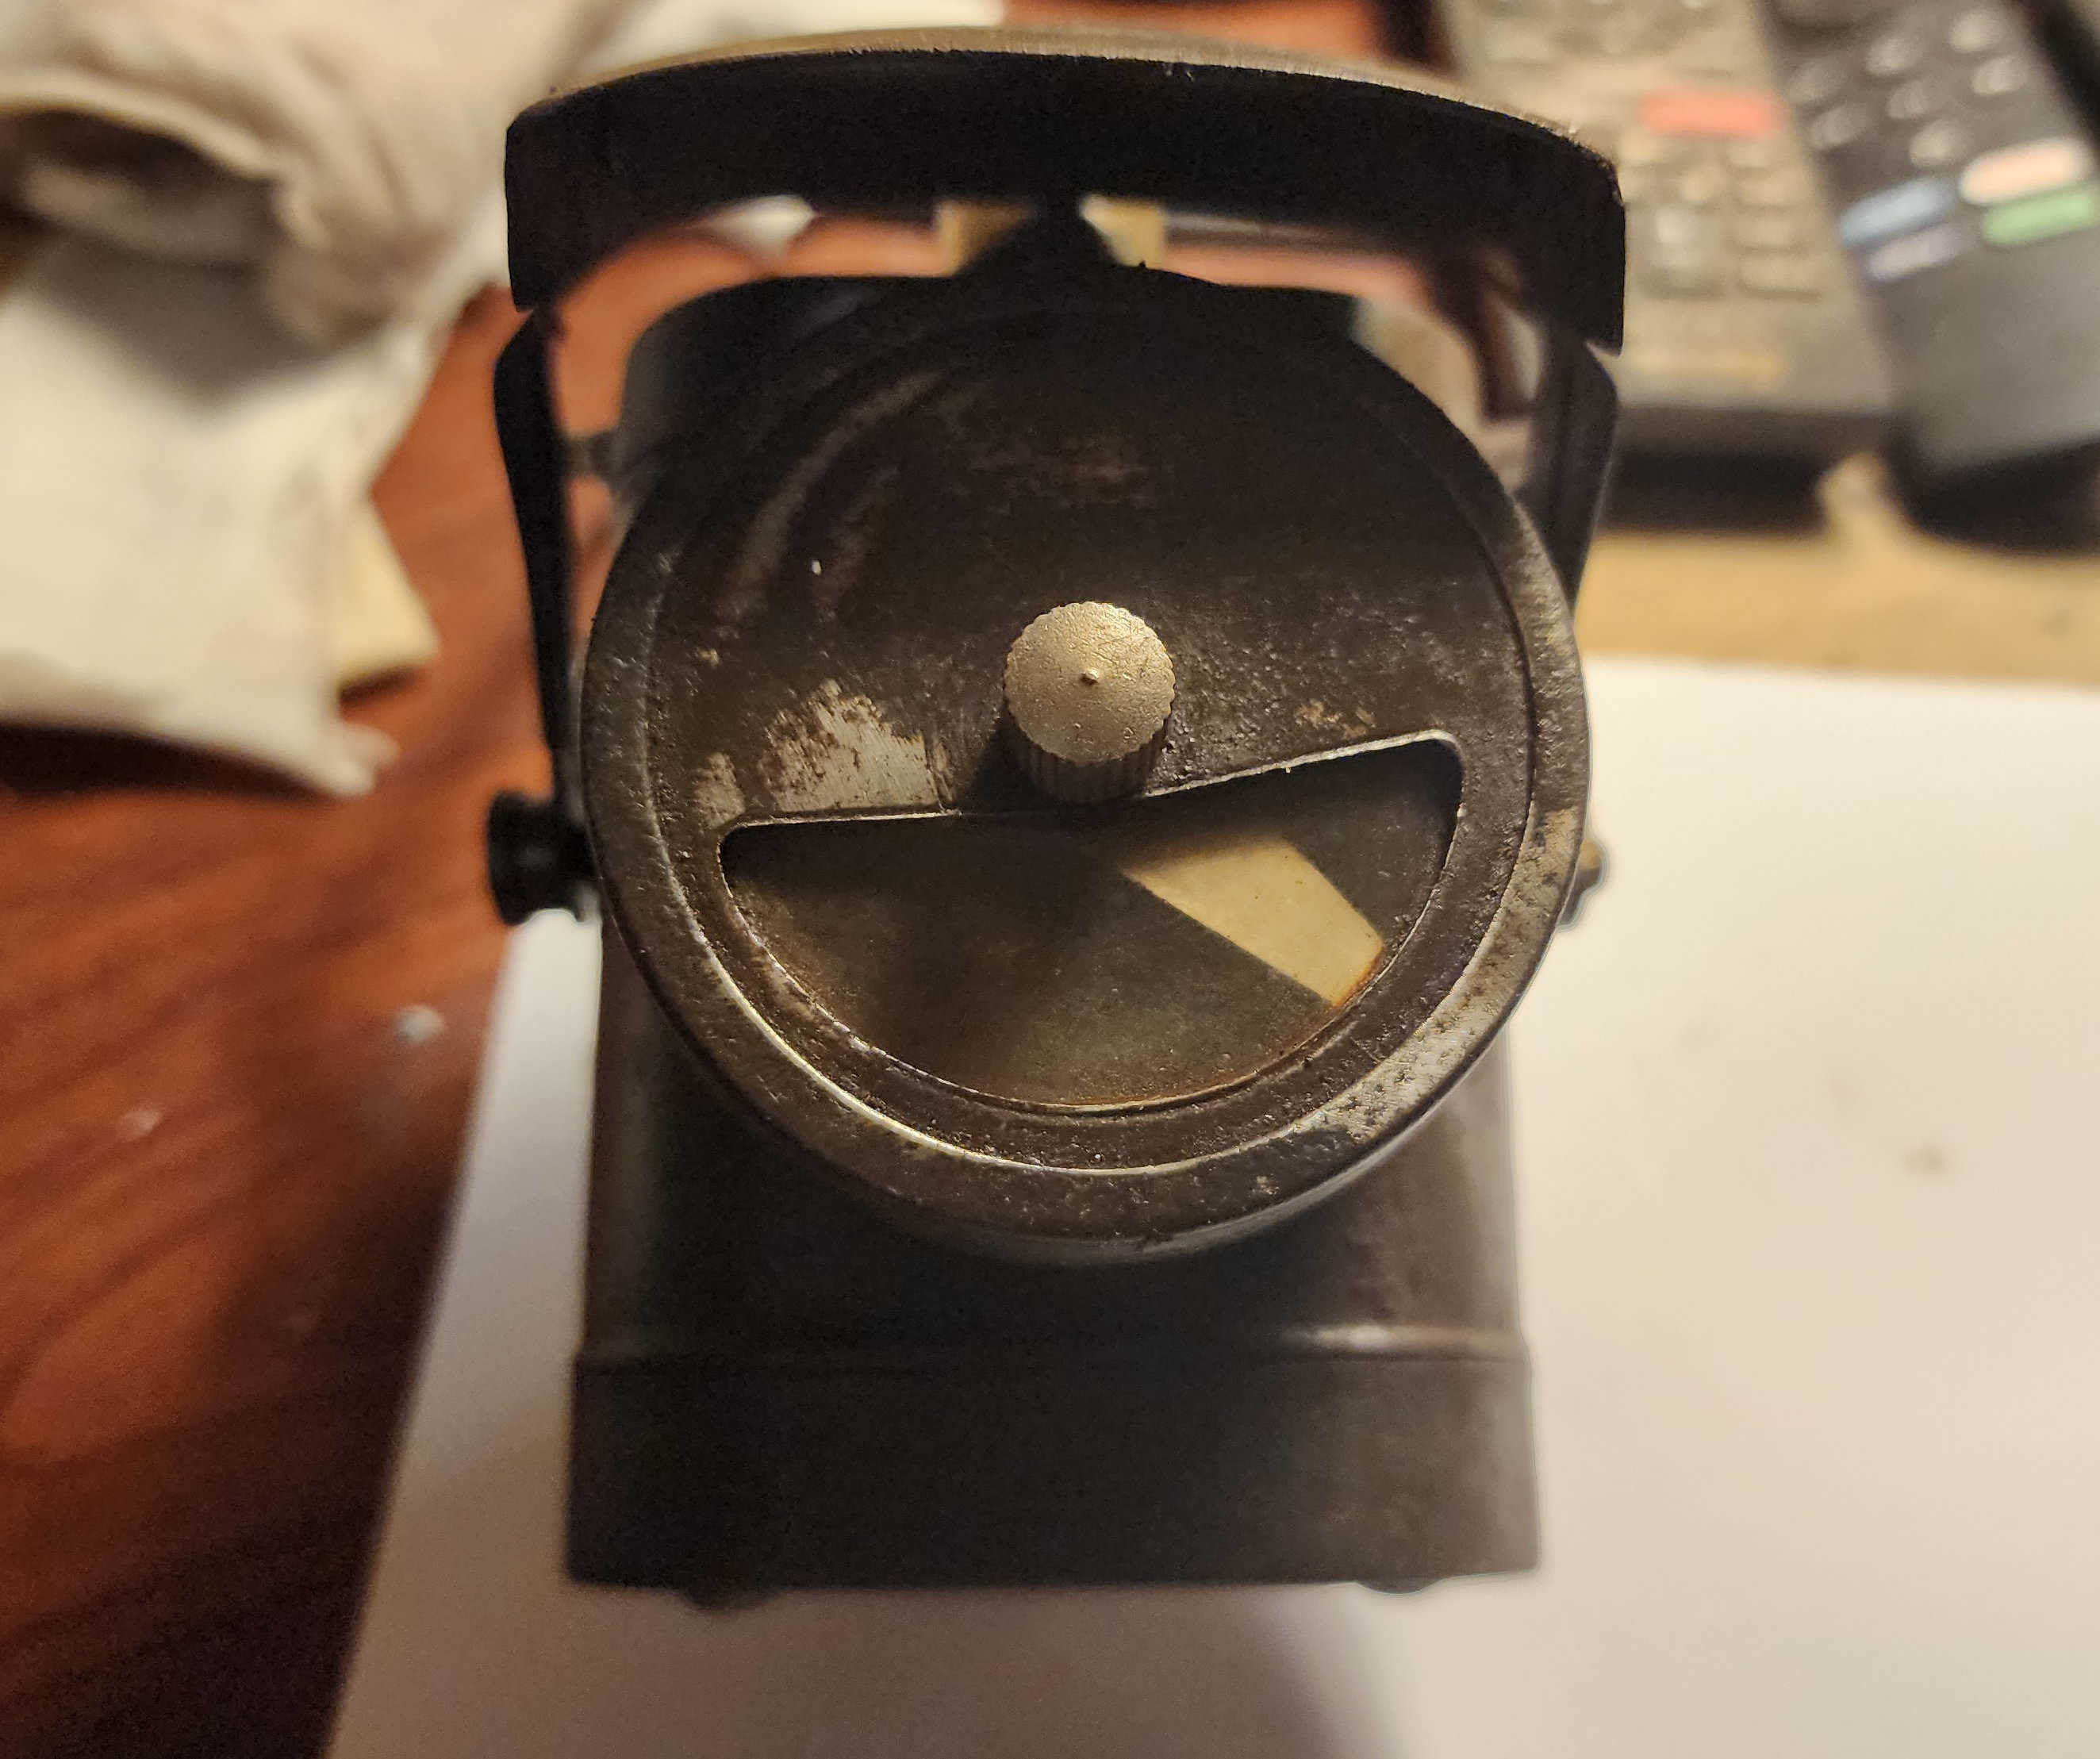
- Glass lens hazy from a thin film of dirt; no cracks or major chips noted.
4. Conservation Objectives
The following goals guided the conservation approach:
- Arrest active corrosion and remove loose dirt while preserving original paint, markings and patina.
- Free seized or stiff components so the hood, knob and clip move smoothly without forcing or bending parts.
- Restore safe, reversible electrical function using modern batteries and a replacement bulb, with no permanent modifications.
5. Treatment Summary
Treatment focused on gentle mechanical and chemical cleaning, targeted rust removal and minor functional repairs. Seized metal interfaces were softened with Evapo Rust, then rinsed and dried. The case and lens were cleaned with mild solutions to lift dirt without disturbing the remaining wartime paint. Electrical contacts were cleaned, and a simple, fully reversible battery adapter and replacement bulb were fitted so the lamp could be safely demonstrated in working condition.
6. Detailed Treatment Steps
- Initial documentation and dry cleaning: The lamp was photographed from multiple angles in its as found state. Loose dirt and dust were removed with a soft brush and low suction vacuum, paying attention to seams, the hood hinge area and around the rear clip.
- Targeted rust and residue removal: The battery compartment, hood hinge and other lightly corroded interfaces were treated with Evapo Rust applied with cotton swabs and small pieces of cloth, rather than full immersion. The most challenging step was freeing the stuck top section of the battery compartment: repeated applications were worked into the seam, then the top was gently eased up a little at a time until it finally lifted free without bending the lip of the case. After rust softening, residues were wiped away, surfaces were dried thoroughly and any remaining old cell residue was mechanically lifted with wooden picks and cloth.
- Cleaning of painted surfaces and glass: The exterior paint and markings were cleaned with a mild soap solution on dampened cloths, working in small areas with minimal pressure to avoid lifting the original finish. The glass lens was cleaned on both sides with a non ammonia glass cleaner applied to cloth, not directly to the glass.
- Mechanical adjustments and lubrication: The hood hinge, top knob and rear clip spring were gently exercised once corrosion was reduced. A trace amount of light oil was applied to the hinge and moving parts, then wiped back to leave only a thin film to slow future oxidation.
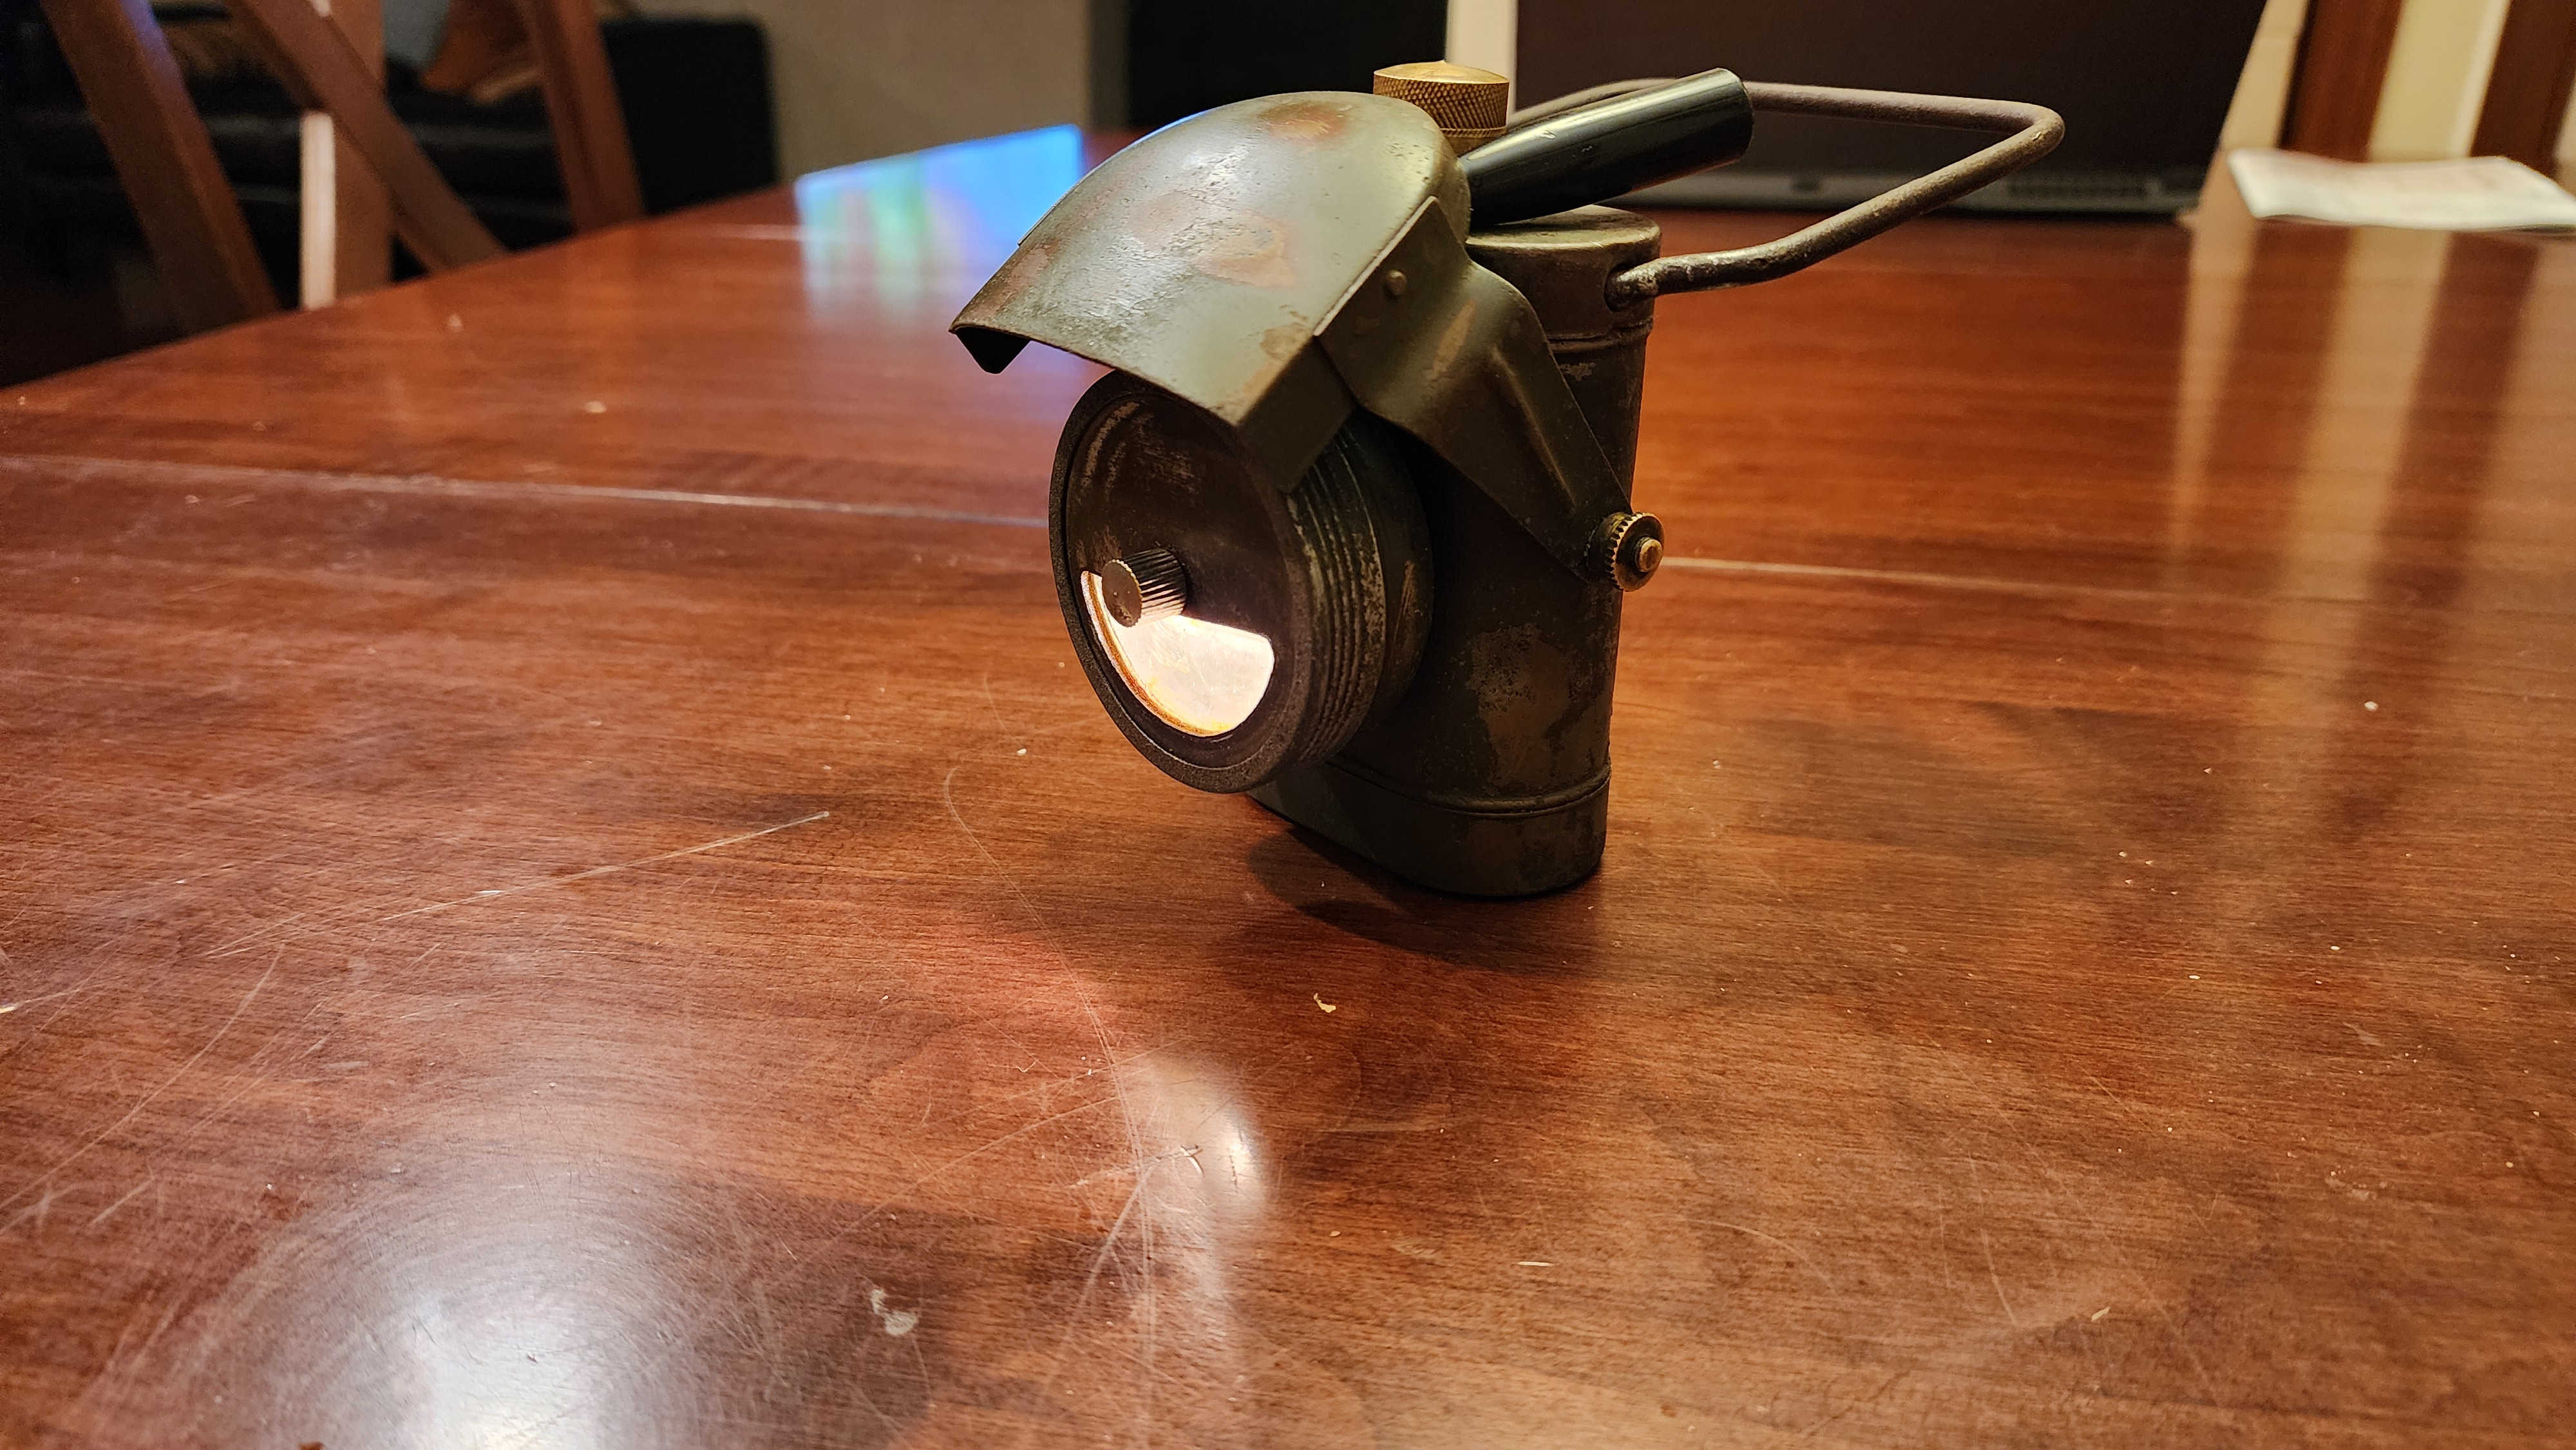
- Electrical function and adapter fabrication: Contacts were cleaned with a fiberglass pencil and contact cleaner where necessary. A simple drop in adapter was fabricated to allow modern cells to be used without altering the original case or hardware, and a compatible replacement bulb was installed. The circuit was tested for reliable operation.
7. Results & Findings
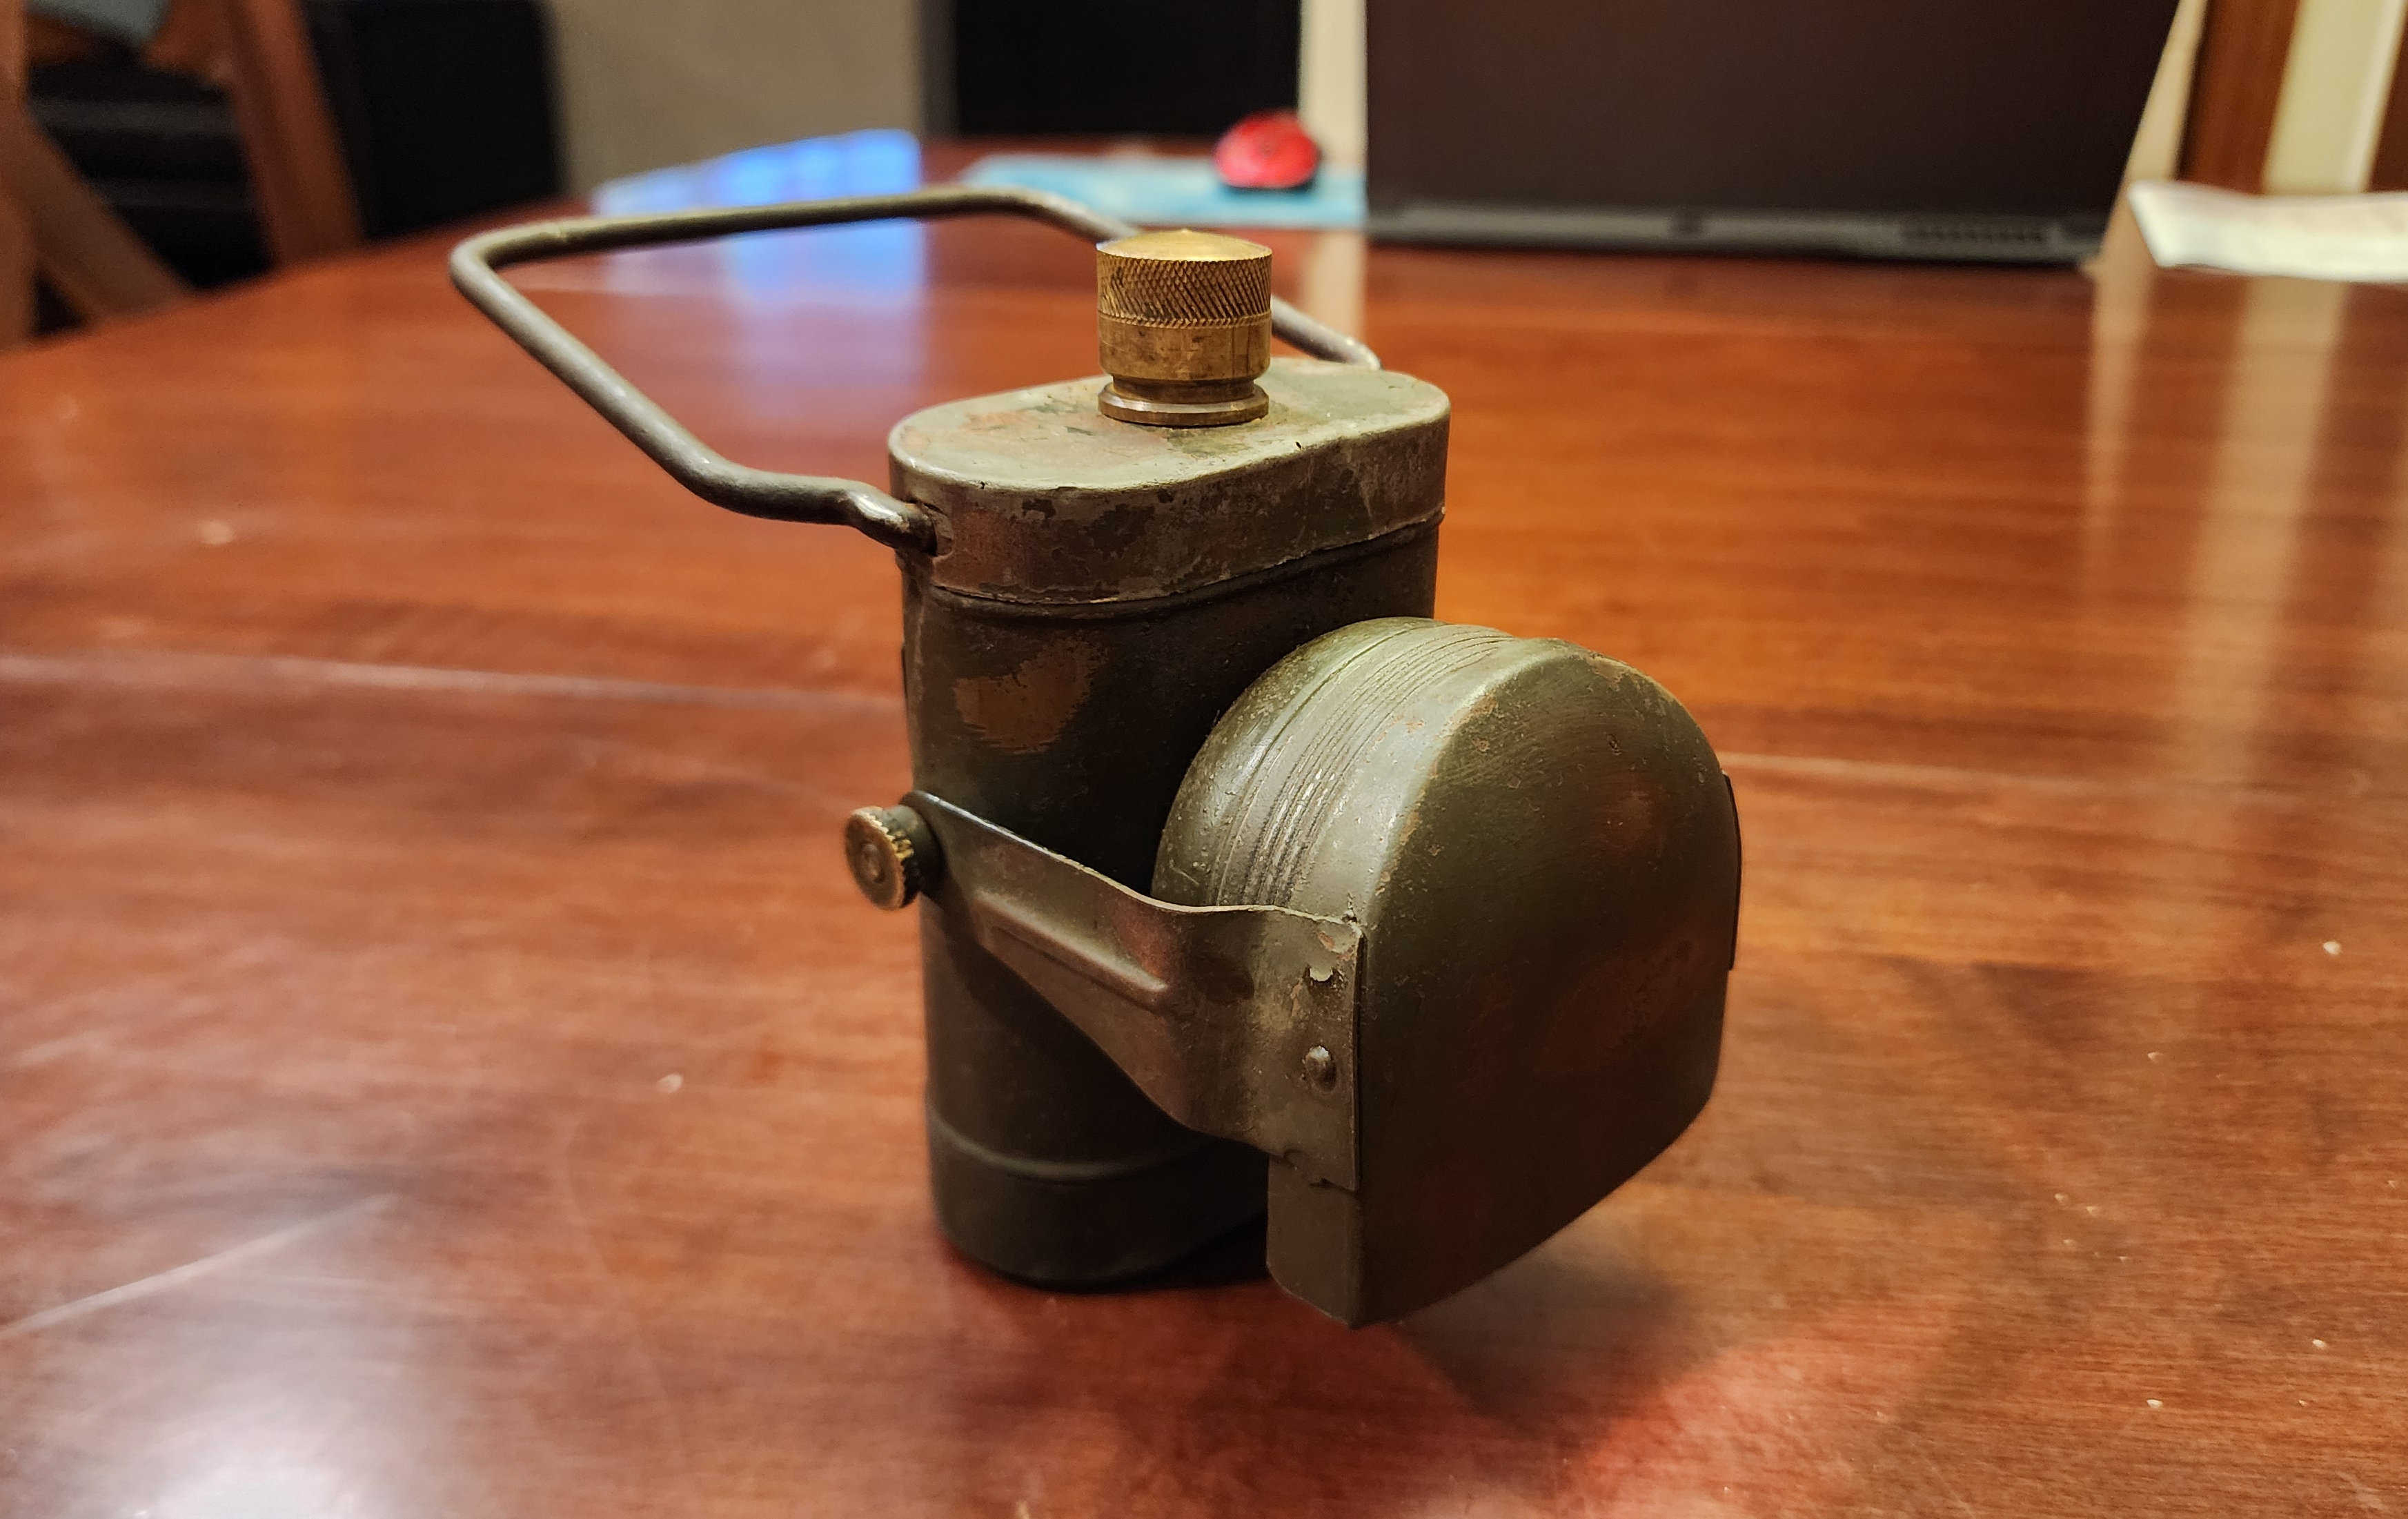
The lamp now presents as a clean, complete and fully functional example with stabilized metal surfaces and preserved original finish. Dirt and active corrosion have been removed, but the lamp still shows appropriate service wear that matches its age and use.
- Original paint and stamped markings, including "LAMPS ELECTRIC NO. 1 / C.H. LTD" and the Broad Arrow, remain clear and legible with no new losses from treatment.
- The hood, top knob and rear clip move freely. The previously stuck top section of the battery compartment now lifts free smoothly but still fits snugly in place, and the lens is bright and transparent with a clean interior.
- With the modern battery adapter and replacement bulb in place, the lamp functions exactly as intended and demonstrates a controlled, downward directed beam suitable for blackout and inspection work.
8. Recommendations for Future Care
Store and display the lamp in a dry, stable environment away from direct sunlight and high humidity. Batteries should only be installed when the lamp is being demonstrated and should be removed immediately afterwards to prevent future leakage. Dust can be managed with a soft brush or dry microfiber cloth. No further oiling is required beyond an occasional light wipe on the hinge if it begins to feel stiff again.